
Do you know how to improve Wi-Fi in your garden? The ability to provide your home with a wireless internet connection is quite good with today’s routers. Most people are aware of how to eliminate dead spots by upgrading their router or, even better, by switching to a mesh Wi-Fi system.
However, what about outside? Many gadgets, such as security cameras, smart lighting, doorbells, and even your phone or tablet when you wish to use it in the garden, still require a connection outside. There is a larger requirement for reliable outdoor Wi-Fi now that even BBQs and other outdoor devices are starting to include it.
Read more: 7 Best Ways to Send Large Files Over the Internet
improve Wi-Fi in your garden

You already know that your home’s walls are a somewhat good Wi-Fi barrier since you are reading this, which explains why you are unable to access the internet in your garden. Additionally, even though signals may easily pass through the glass, the problem still exists that signal strength decreases as you go farther away from your router.
If you wish to work in an outbuilding like a garage or a garden office, it becomes a serious problem if web pages take a long time to load or Netflix buffers frequently.
We’ll go over your options and potential costs in this section. If you’re fortunate and can move your router, it can be completely free, but in most circumstances, you’ll need to spend money on gear to complete the task.
Freebie – Reposition your router
Your Wi-Fi signal is provided by a single broadband router in the majority of homes. However, the fact that the box is frequently hidden out of sight can negatively impact its Wi-Fi.
A single router would be placed in the middle of your house in an ideal scenario. For better reception upstairs on a two-story building, the lower floor should be as near the ceiling as possible.


You should position your router as close to where you require internet access in the yard as you can given that we’re talking about stronger coverage outdoors.
Many routers have internal antennae, like the one in the image above, thus there is no need to modify anything because it should create a 360° signal. However, you can try positioning the router such that it faces a wall (or window) to see if that improves the signal outside.
Other routers include external aerials that can be adjusted for angle. Again, if they are made to be directional, turning them toward your garden can significantly improve matters.
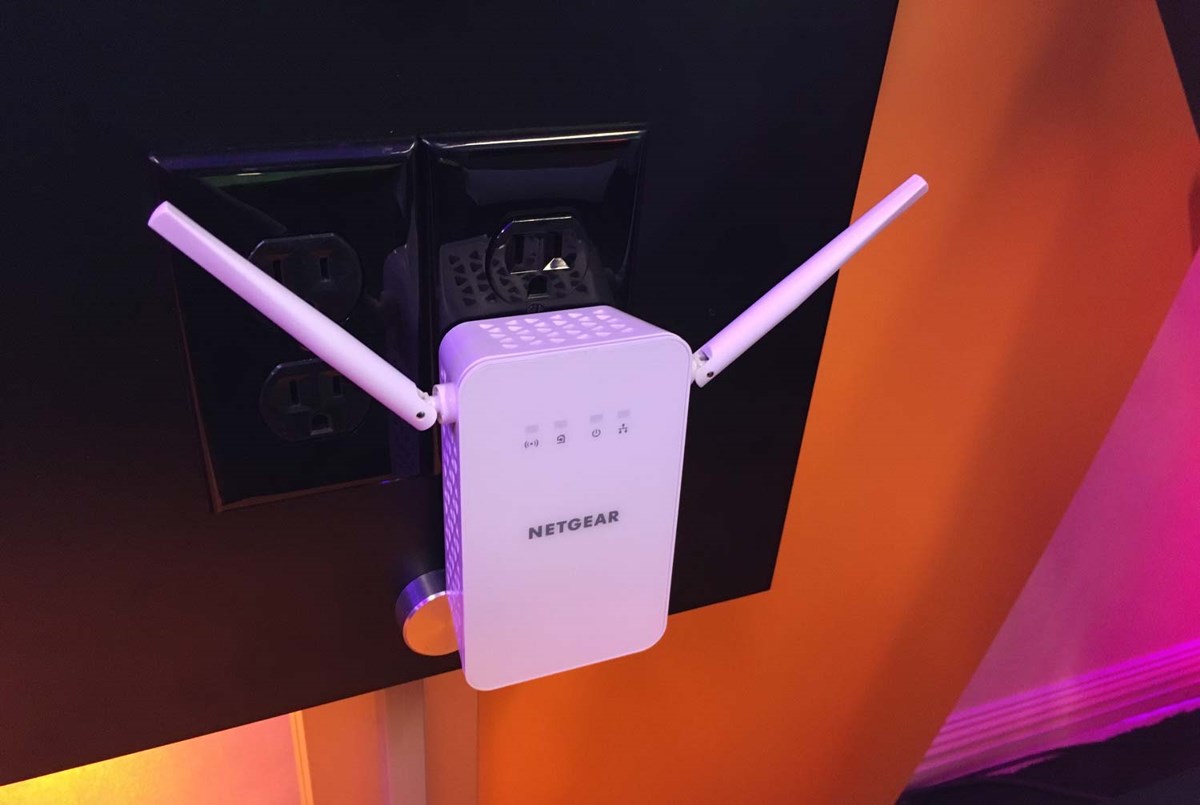
Powerline adapters
For most individuals, this solution is the quickest, simplest, and most cost-effective one, but it depends on the location where you want to connect to Wi-Fi having access to mains electricity.
The powerline adaptor needs to be in a location where it cannot get wet, thus this choice is best for people who want dependable internet in a garage or shed.
Plug one powerline adapter adjacent to your router and the other into a socket where you need Wi-Fi. Powerline adapters convert electrical lines into network cables. It’s important to note that common powerline adapters (like the Netgear models below) lack Wi-Fi. As a result, you must purchase a kit with at least one plug that has built-in Wi-Fi, such as the TL-WPA8631P KIT from TP-Link ($107.99 / £89.99).
Powerlines have the disadvantage of occasionally being somewhat slow. The TP-Link package purports to give 1500Mbps, but in practice, you might only obtain 40Mbps or even less. This is because the powerline doesn’t appear to appreciate long mains cable lengths, such as one that connects your home to a garden room.
The age, quality, and length of the mains wire, as well as the capability of the powerline kit, all play a significant role in whether or not you receive greater performance.
However, that rate of speed might be acceptable because it’s adequate for routine tasks. A basic-quality video chat requires roughly 5Mbps, but if you need a greater speed to download or upload huge files, you may need to use a different way.
Buy an outdoor Wi-Fi antenna
Purchasing an outdoor Wi-Fi aerial is an alternative if you don’t have power outside. There are two types of them. The first type attaches directly to your router in place of one of its standard antennae; however, you must check to see if your router has detachable ones. This advice won’t be of any benefit because the majority don’t.
Here are some outside aerials you can purchase from Amazon for as cheap as $15 (or £12) if you do have a suitable router.
However, there is an alternative: an external USB Wi-Fi antenna. But this isn’t the same thing. It is made to be connected to a distant device, such as a laptop. It should be able to pick up the iffy signal coming from your network if you install it on the wall of your garden room, or garage, facing your home. They cost more, with prices beginning at $40 / £30.
An external Wi-Fi router like the TP-Link Deco X50 Outdoor (above) provides a third choice in this situation. It can be installed on a pole or a wall for $129.99 / £109.99. TP-Link’s X50 mesh Wi-Fi range includes it, although you are not required to utilize it with the X50 system. The same result might be obtained by using an Ethernet cable to connect it to your standard router. At a range of 200–300 feet (60–90 meters), and potentially further if there are few impediments, it ought to offer robust Wi-Fi.
Buy a Wi-Fi extender or mesh Wi-Fi kit
A Wi-Fi extender is an alternative if you are unable to move your router closer to the location where you want an outdoor signal.
They are inexpensive—less than the price of a pair of powerline adapters—and can speed up your Wi-Fi so you can access the internet in your backyard.
However, there is a disadvantage: since extenders take the signal from your router and rebroadcast it, they are not the fastest option here because they must use half of their speed to receive the signal and the other half to broadcast it.
Similar to a powerline, the speed you receive can be sufficient. The biggest issue is that it’s impossible to predict how much outdoor coverage an extender will provide. They should work perfectly if you only need a Wi-Fi signal nearby (say, within 20 to 30 feet), but they might not provide you with an internet connection inside an outbuilding located further away.
You might try connecting in an extender in your outbuilding to see if you can get a strong enough signal from your router if it has mains power and isn’t too far from your home.
However, there is a considerable likelihood that the signal won’t be strong enough for an extender if it is farther than about 30 feet from your residence.
With mesh Wi-Fi kits, the scenario is comparable. More information on mesh Wi-Fi can be found in our roundup of the best systems, but suffice it to say that these multi-router systems typically need to be placed close together — we’re talking about distances similar to those of Wi-Fi extenders — so you’re unlikely to get a strong enough signal for them to function properly if your garage, shed, or garden room is more than 30 feet from your home.
Run old-school Ethernet
In the past, this author has used Ethernet cables to get around the very limited range of household Wi-Fi routers by wiring them from the main router in the home to a garden room more than 200 feet away. Additionally, it is reasonably affordable, especially if you’re willing to install them yourself.
The cable itself is offered in lengths of up to 100 meters (300 feet) and is delivered on a reel. You should purchase a cable that is approved for outdoor use, and you should especially search for a cable made for “direct burial.” Whatever you do, avoid trying to save money by purchasing indoor Ethernet. It lacks the solid copper wires necessary to terminate it to a face plate and will quickly corrode in the sun without a tough PVC coating.
In comparison to feeding thin Ethernet wire through a wall, you’ll need to drill a much wider hole to accommodate ready-made outside cables with Ethernet connectors on either end. Additionally, the unique tool needed to fit the RJ-45 connectors is inexpensive to purchase and simple to use. But rather than using RJ45 connectors, you should install Ethernet wall plates for a more polished appearance. They are inexpensive, simple to install, and only marginally more challenging to wire.
You’ll have a lightning-fast internet connection in your outbuilding once your cable is installed. You will want a second router in the access point or “bridge” mode or, even better, a mesh Wi-Fi system with a wired backhaul to obtain Wi-Fi.
Simply said, it means that an Ethernet connection rather than Wi-Fi can be used to link the routers.
The benefit of this approach is that your devices will be able to connect to a single, seamless Wi-Fi network whether you’re in your home or an outbuilding.
Read more: Ufone Internet Packages 2023 – 3G/4G, Daily, Weekly, and Monthly
Buy a point-to-point system
A point-to-point (PtP) Wi-Fi system is intended to serve as a wireless bridge between, for example, a house and a garden room. It does precisely what it says.
However, they are the kinds of gadgets that businesses offer to professionally install for you and are not intended for consumers. And if money isn’t an issue, that’s fine.
The prices of the devices themselves range from reasonable to exorbitant. Even if that price is for a simple 802.11n device that won’t provide particularly fast speeds, you can purchase them for as cheap as $40 or £30 each. These ‘CPE’ devices are produced by numerous companies, including TP-Link and Ubiquiti.
The price can quickly add up for a pair, and you’d obtain a faster and possibly more dependable connection by putting Ethernet cables down your lawn. A faster, more powerful, and more durable variant could cost from $250 to $1000 / £200 to £800.
Depending on the model you purchase, you might only need one because they are directional and made to be put outdoors. This allows you to target them at your home’s router and, possibly, receive a strong signal for the devices in your outbuilding.
If you have a pair of them, connect one to your router, place one facing it from your outbuilding, and connect the other to a second router or access point to provide internet access to the devices in your outbuilding, they will function best and provide the best range.
They typically operate via Power-over-Ethernet (PoE), which isn’t something many homes are set up for and necessitates additional gear, which is another reason you’d want a professional to install them.
Some PtP units include PoE mains adapters, which greatly simplify the task for the do-it-yourselfer. Make sure you do your study and know exactly the kit you need to make it all work if you decide not to hire professionals.
By now, you should be aware of all your alternatives for improving your internet connection in your yard, most of which are inexpensive and simple to install on your own.


One Comment