
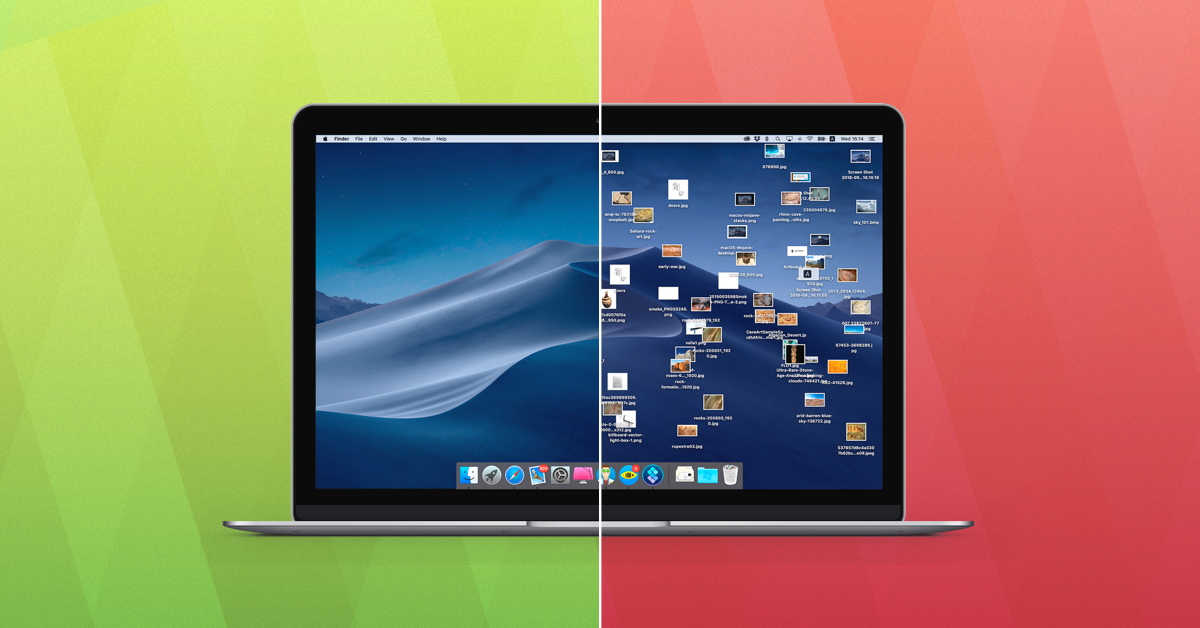
Organizing Photos on Mac, We all have a few private photos on our PCs somewhere. On our system, these images are typically crowded together and occupy a sizable amount of disc space. It would therefore be simpler for us to edit and navigate through our memories if they were organized.
The Images program that comes standard with Mac computers is the best for organizing photos. You may manage your photographs in a variety of ways using this app, and you can also sync all of your images using your iCloud account. The application’s functions are fairly seamless, and its various features are simple to use.
How Can I Arrange My Photos on a Mac?
The Photos app may be accessed from your Launchpad or the Finder, just like any other application. It provides the most practical method for you to arrange your images. Once you’ve done that, you may use this application effectively and efficiently to view and edit all of your photos.
Read More: Why Listing Photos Matter?
Organizing Photos on Mac/ View Pictures in the Photo Gallery
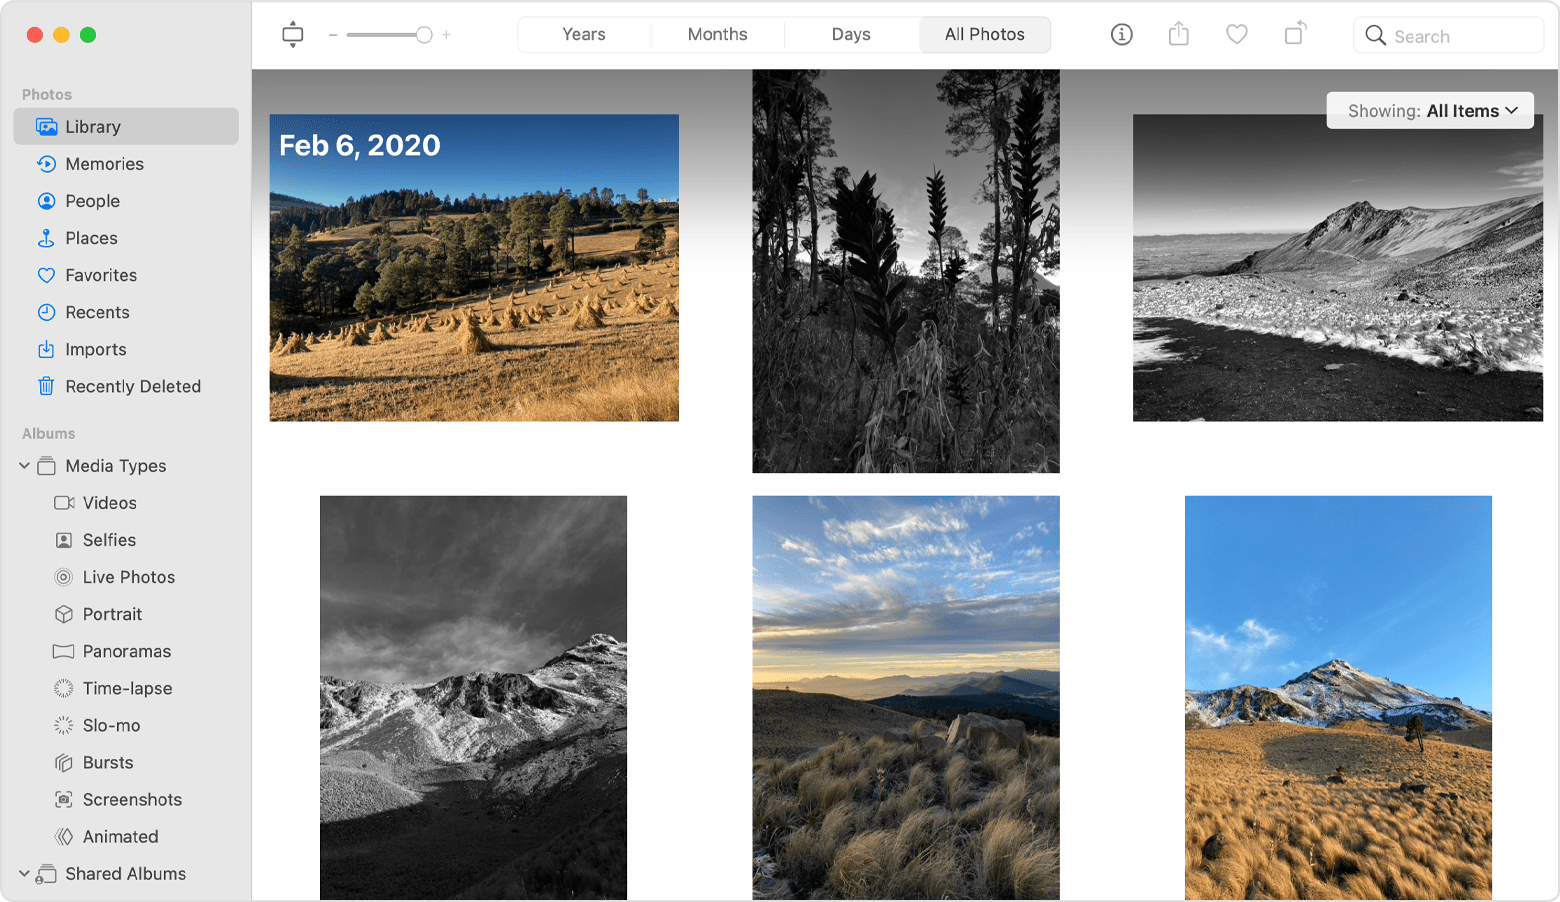
All the media files you’ve imported into your Photos app are available in the library. You can sort and view these images and videos using the Years, Months, or Days formats.
The application will gather all the photos that were taken and modified over the specified period if you wish to do so.
Years, for instance, will display the photos and videos you took in 2022, 2021, etc., while Months will display the photos and films you took in October 2022, January 2021, etc.
However, not all of the photos on your Mac will automatically show up in the Photos app. This is due to the fact that your iCloud account can sync all of the media files on your Photos app.
You can browse all of those media files from various devices that share the same Apple ID by doing this. The iCloud sync feature can also be turned on or off at your discretion.


In light of this, the following is how you import photographs into the Photos app:
1. Launch Photos.
2. Select File > Import from the navigation bar. import-images
3. Select the necessary photos, then import them.
4. You can now find this picture in your Photos Library.
Change your photo collection
There may be other libraries on your system besides the Photos library. Images captured by your system webcam, for instance, are kept in a distinct library and different places on your computer. However, the Photos app’s preference settings allow you to instantly switch to the main photo library. Here’s how to go about it:
1. Launch Finder.
2. From the sidebar, select Applications.
3. Open Photos while holding Option.
4. Select Other Library from the Choose Library popup that displays.
5. Choose the necessary library, then click Open.
Read More: 5 Best Tools to Download Instagram Photos
Sort by People & Locations
You may organize your photos using the People and Places categories in the Photos programmed. You can access these options from your application’s left sidebar.
The Photos app’s People feature automatically groups images according to the faces in them by scanning all the faces in your photo library. By clicking on Unnamed and entering the desired name, you can give these image groups additional names.
The Photos app also has a feature called Places that arranges photos according to where they were clicked. However, not every image is immediately allocated a place or location. So, you have the option to manually add location data to the images in your library. How to do it is as follows:
1. Click the Library tab in the sidebar of the Photos app.
2. The image you want to give a location to should be opened.
3. From the ribbon menu, select the Info icon.
4. Then select Assign a Location.
5. From the drop-down list, type the relevant location and choose it.
6. You can also choose to Add Faces from this point. In contrast, the application automatically scans and groups the faces on the People tab, as was already described.
Put Your Own Spin on Memories
A fun way to view and arrange your media files is with Memories. With background music, a slideshow of the chosen pictures is displayed. You can change the speed of the slideshow to make it move more quickly or more slowly.
Depending on specific image information, such as the time or location the image was clicked on, the Photos app automatically creates memories. You also have the choice to manually create memories using the chosen pictures from your photo library.
Make a fresh memory
Follow the instructions below to create a new memory:
1. Launch Photos.
2. Next, select an album from the My Album section.
3. Click on Play Memory Video in the album.
4. Click on the Options icon on the ribbon bar of the preview window and then choose Edit Title.
5. Give your memory a new name, then save it.
6. Click the Favorites icon on the same ribbon bar to add this to Memories.
Get Your Memories in Order
Organizing Photos on Mac,Place the memories you’ve chosen on a different tab to further arrange them. The memory in question will be added to the Favorite Memories tab if you play memories in the Photos application and select the Favorites icon from the ribbon menu.
Right-click on the memory and select “Remove from Favorite Memory” to take it off of the Favorite Memories menu. Additionally, select Delete Memory from the Memories menu to completely delete a Memory.
The speed of your memory slide display can also be changed. Here is how to go about it:
1. In the sidebar of the Photos app, select Memories.
2. Recall something.
3. From the ribbon menu, select the Options icon.
4. You can choose a short, medium, or long slideshow speed.
5. The ribbon menu’s volume slider can also be used to lower the background volume.
Control Your Albums
Your images, videos, and other media items are gathered in albums. The best way to arrange the photographs on your Mac computer is with albums. You may navigate through your library and find the needed image faster by creating various albums for photos taken on different occasions.
Make a new album
Organizing Photos on Mac, Albums are not automatically created by your Photos application, in contrast to Memories, People, and Places. You can organize them and make a new album by following the instructions below:
1. Launch Photos.
2. Click the plus sign next to My Albums on the sidebar.
3. Select to make an album.
4. To rename this new Untitled Album, choose Rename from the context menu.
5. This album’s name.
With the help of Photos’ smart album feature, you may establish certain image requirements for a given album. The system automatically produces a (smart) album with all the photographs that match the conditions when you select them.
1. Launch Photos.
2. Click the plus sign next to My Albums on the sidebar.
3. Decide to build a Smart Album.
4. Choose a clever album name.
5. Next, decide which of the following conditions to match.
6. Click OK after making your selection from the drop-down list of possible conditions.
7. The smart album is automatically updated with any images or videos that fit certain criteria.
Through the Photos sidebar, you may access every album you make on the Photos app. These albums can be moved up or down the sidebar album list by holding them down while doing so. You have the option to merge the two albums when you drag one album over the other.
Organizing Photos on Mac/ Include images in an album
Follow these steps to add images and videos to an album:
1. Launch Photos.
2. From the sidebar, choose Library.
3. Right-click the chosen images or videos and select Add to.
4. The drop-down list allows you to choose your album.
Make shared photo albums.
You can share your albums with your friends via Shared Albums. Your iCloud contacts can be invited to view the photos in a shared album that you create. The invited individuals can also add their photos to that album. The following describes how to set up a shared album on your computer:
1. Launch Photos.
2. To create one, click the “+” sign next to Shared Albums on the sidebar.
3. Shared Album Name: type it in.
4. Next, choose the invitees from the list by clicking “+” next to Invite People.
5. Click Create when everything is ready.
6. From the sidebar, launch the new album you just made.
7. Select Add photos and videos after that.
8. Click Add after selecting the desired images or videos.
Organizing Photos on Mac/iCloud-Sync Your Photographs
Your media collection is copied to the iCloud servers when Photos is synced with iCloud. The library is then accessible via the iCloud website or from any connected devices using the same Apple ID.
You can completely delete the media library from your Mac if you are out of space because the entire collection will be uploaded to the iCloud servers. So, the following is how to sync your photos with iCloud:
1. Launch Photos.
2. Navigate to Photos > Preferences from the menu bar.
3. Go to the iCloud tab by navigating.
4. Choose the option to have iCloud Photos automatically upload your media file.
5. Create an iCloud account.
6. Open Finder after this is finished.
7. Go to Apple > System Preferences in the menu bar.
8. Select Apple ID.
9. iCloud can be chosen on the sidebar.
10. Select the boxes next to “Photos” and “iCloud Drive.”


One Comment