Finding Clipboard on PC, You can temporarily store data, such as text or image files, in the Clipboard, which functions as a buffer. When a text or picture file is copied, it is momentarily stored in the Clipboard and is retrievable later.
However, the Clipboard feature by default only allows you to store one file. As a result, the preceding file is overwritten whenever you copy something else to your clipboard. It might considerably slow down your job and severely reduce productivity.
But if you enable the Clipboard History option, you can prevent this. Your clipboard can hold up to 25 files, and you can navigate through them to select the one you wish to retrieve.
Read More: ASUS Laptop From USB; How to Boot?

Explore the Contents
Finding Clipboard on PC, Make Clipboard History active
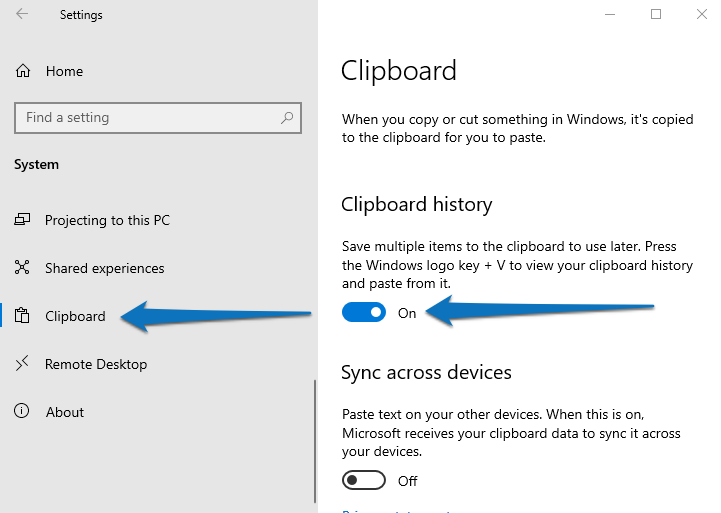
All Windows systems come with the Clipboard History capability deactivated by default. Therefore, you must enable Clipboard History if you wish to store and navigate through the files in your clipboard.
- By hitting the Windows + I keyboard shortcut, open Settings.
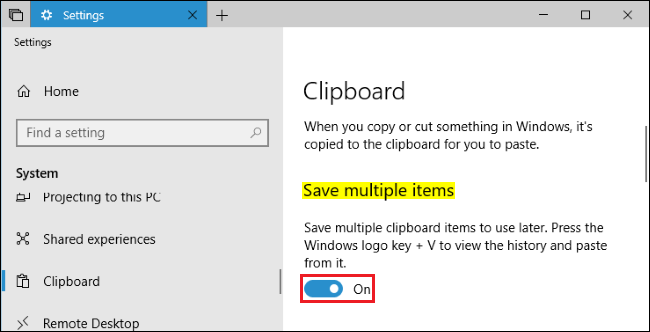
- Then click System > Clipboard.
- Turn on the history of the clipboard.
Finding Clipboard on PC, Using the same Microsoft account, sign in to a Windows PC.
- Enter the clipboard settings as described above.
- Click Get started after selecting Share across devices. (Make sure your Microsoft account is active and logged in. This choice will take you to your account settings if you’re not.)
- To verify your identity, select your Microsoft account. (Your password might be required.)
- Click Verify after entering the code that was emailed to your account.
- The Sync across your devices option should become available when you have verified your Microsoft account. It will by default be turned on.
- Under the option for “Sync across your devices,” you can also decide whether to manually or automatically sync your clipboard history.

Clipboard History Access
Finding Clipboard on PC, By pressing Windows + V, you can quickly view the history of your clipboard. A little pop-up window will appear and display every item that has been copied to your clipboard. This shortcut key will prompt you to turn on Clipboard History if you haven’t already done so by displaying a Turn on button.
The most recent thing copied will be visible at the top of the clipboard, which has a maximum capacity of 25 items. Use the Windows + V keyboard shortcut to quickly retrieve a specific clipboard item, select it, and then paste it anywhere you like.
The clipboard history will be cleared if you ever restart your computer.
Read More: Repairing a Broken Screen on a Dell Laptop.

Finding Clipboard on PC, Managing the history of a clipboard
In Clipboard History, there are two more things you can accomplish. You can either delete superfluous items that are eating up clipboard space or pin regularly used items so they won’t be misplaced. Additionally, you can filter your clipboard by combining the two.
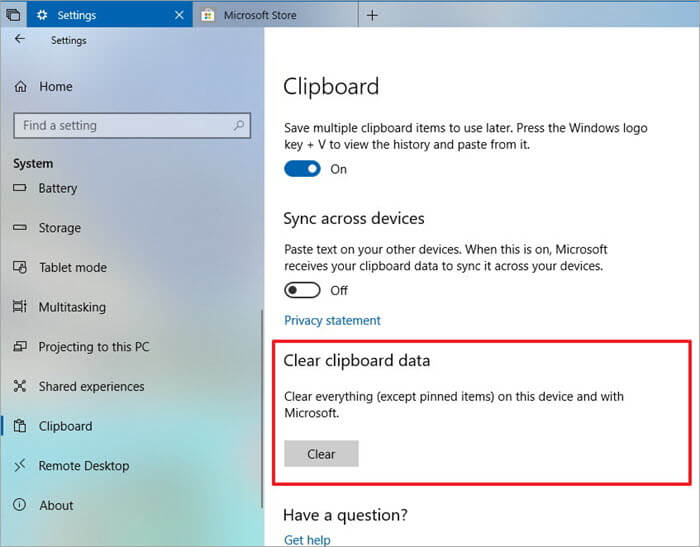
Finding Clipboard on PC, You can pick the trash can icon to remove items from your clipboard by clicking the ellipses icon next to them. You can click the Clear all option to immediately empty your whole clipboard if you want to.
Click on the pushpin icon next to the item you want to pin to quickly access it. This will guarantee that your pinned file won’t be lost even if your computer restarts or your clipboard is cleared all at once.


