FAT32 Max Size: What Is It? How to Avoid It

FAT32 Max Size, When formatting a drive with 64GB or more in Windows, you will discover that FAT32 cannot be selected as the File system. Both the command line and the graphical user interface on Windows will prevent you from formatting such disks to FAT32.
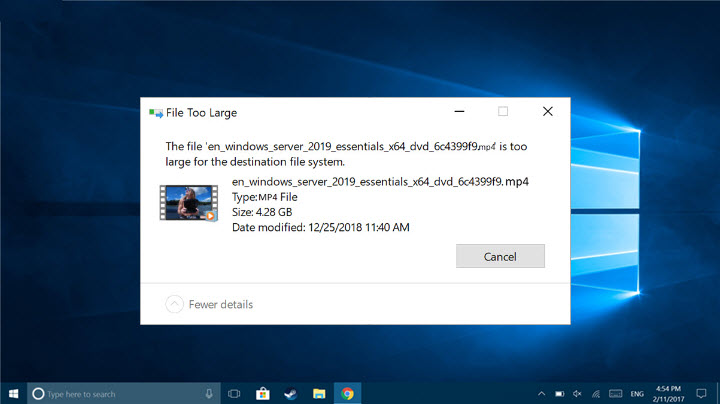
In fact, if you’ve ever copied a file to this disk and received the error message “The file is too large for the target file system,” you might be worried about the file size restriction on a FAT32 partition. However, Windows permit the use of a preformatted FAT32 drive with a significantly larger capacity.
Read More: 5 Ways to Recover Deleted Photos on WhatsApp

FAT32 Max Size, What Are the FAT32 Size Restrictions?
A FAT32 partition has two basic size restrictions. One, Windows can only format partitions up to 32GB in size using the FAT32 file system. Another limitation is that a single file on a FAT32 drive with Large-file support can only be up to 4GB in size.
Design-wise, a partition up to 2TB in size can be formatted to use the 512-byte default sector size of the FAT32 file system. Moreover, a partition with a maximum capacity of 16TB can theoretically be formatted using this file system by setting the sector size to 4090 bytes of 4KB.
FAT32 Max Size, However, because FAT32 is not a fault-tolerant system and using this system with such huge drives increases the risk of data loss, it is not advised to do so. Because of this, Microsoft switched to NTFS.
And when it comes to the 4GB file size restriction, the FAT32 file system is to blame. The starting point and length of a file are specified by an index that is used by FAT. The highest value that may be saved for the length because it is contained in a 32-bit field is 232-1 = 4294967295 bytes, or 4GB.
How to Get Around the 32GB Size Cap?
The 4 GB maximum file size restriction on a FAT32 partition cannot be overcome since it is a flaw in the architecture. We advise converting to NTFS or exFAT in order to get around such restrictions.
By utilizing third-party software or a Linux operating system to format the partition, it is possible to get around the maximum partition capacity restriction.

FAT32 Max Size, Utilizing Software from Third Parties
Any partition up to 2TB in size can be converted to FAT32 file format using several third-party programs. Here, we will utilize the GUI version of the open-source program FAT32 Format as an illustration.
- Get and launch the FAT32 format.
- An executable program named guiformat.exe should download. Start the app.
- The partition you want to format should be set as the drive.
- Specify the initial allocation size as desired. Set it considerably lower if you plan to keep smaller files on the device. Otherwise, leave it alone.
- Any volume label you desire should be entered. If you don’t fill it in, the drive’s default label—Local Disk for non-PNP disk partitions and USB Drive for USB PNP drives—will be shown.
- Checking Quick Format is advised.
- The formatting will then start after you click Start.
FAT32 Max Size, Using a Live Linux USB or a Linux virtual machine
Try formatting the drive to FAT32 on the Linux system if you’re an experienced user who is very familiar with Linux systems and/or virtual machines. It will not only get around the 2TB limit on most third-party software as well as the 32 GB limit on Windows PCs.
Nevertheless, keep in mind that you must format the drive with 4k sectors and a 64k cluster size and use the GPT partition scheme if you wish to exceed the 2TB limit.
Here, we use a VMware workstation within a Windows system to set up an Ubuntu Virtual Machine (VM). Additionally, you can make a Live Linux USB, boot into Linux with this USB, and then carry out the identical procedure using the Linux OS (steps 2 and 3).

Step 1: Install a disk to the virtual machine
FAT32 Max Size, Any external drive you attach to the VM once it has started up should appear right away. If not,
- On the menu, select VM > Removable device.
- After choosing the external drive, click Connect.
About internal disk,
- Without launching your Linux VM, launch the VMware workstation as administrator and choose it.
- Choose Edit settings for the virtual computer.
- Choose SCSI under Add > Hard Disk.
- Check Click Next and then choose a physical disk.
- Choose the desired Physical Drive from the drop-down box (you can check the disk number on the Disk Management app).
- Choose Next.
Step 2: Build a new GPT partition in step two.
FAT32 Max Size, Only drives or partitions up to 2TB in size can use the MBR partitioning technique. You must first convert the disk of a higher-capacity partition to GPT if you intend to convert it to FAT32.
- Switch to the Linux terminal.
- To list all of your drives, type lsblk -l into your terminal. Check the size to find the drive you require (usually sdb, sdc, etc.). Here, we focus on sdb.
- Enter sudo gdisk /dev/sdb into the command line. Once prompted, enter your password.
- To delete the partitions and build a GPT partition table, enter o and press Enter. then enter after typing y to confirm.
- Create a partition, enter n, followed by the Enter key three times to establish the Partition number, Start sector, and Final sector default values.
- For set the partition to Microsoft basic data, enter 0700 in the GUID or Hex code field.
- In order to write the GPT data, type w and hit Enter. Enter after typing y to confirm.
Step 3: Format Partition to FAT32
FAT32 Max Size, Use the default sector and cluster sizes if you need to format a partition that is 2TB or less in size. So,
- If you’ve already closed the Terminal, open it.
- Enter the command sudo mkfs.vfat /dev/sdb1. (In this case, the lone partition on the sdb disk is called sdb1). If you have another disk with a different name, you must use that partition appropriately.)
FAT32 Max Size, But, you must adjust the sector size to 4k if you wish to convert a larger disk to FAT32. So, use sudo mkfs.vfat -s 16 -S 4096 /dev/sdb1 as an alternative.


One Comment